Table of Contents
What are we talking about
If you have no idea what I mean by "proper" deployment platform, or even if you think you don't need something like this, I suggest you stick around and see what we're discussing precisely and why it's great!
What problem are we trying to solve
If you start working in a team, that is, more than just you, the way you deploy tools and packages might be problematic. I assume you work with a versioning system, most likely git, but then you need to start using branches to make sure you are able to work without breaking the tool for your user(s).
Furthermore, it requires the said user to be somewhat familiar with git, at least git pull, maybe git branch,
and even git checkout.
Finally, if they want to rollback to a previous version, it's getting complicated, they start working in detached head, etc...
To summarize, that require a lot of communication from both ends to make sure people are in the context we assume they are. While it is purely unmanageable at a larger scale, it's already pretty annoying in smaller structures.
The naive approach
Usually, creating and deploying your packages (i.e. the tools you develop) consist into 3 steps.
- writing your package, your python tool, module, etc...
- git commit / git push your code, ready to be used by other users
- ask the users to git pull the latest version, or a specific version, tag, etc...
In addition to the obvious problems we raised in the introduction above, there are other limits:
- You keep a lot of room for miscommunication, misunderstanding, the users will get the wrong version, forget to pull before they start working, or maybe you'll even forget to tell them what version to use precisely, etc...
- If you want to run some tests, generate documentation for your project, or any operation that is required to happen every time you want to release a new version, you have to do it manually. And we hate manual work.
The overkill approach
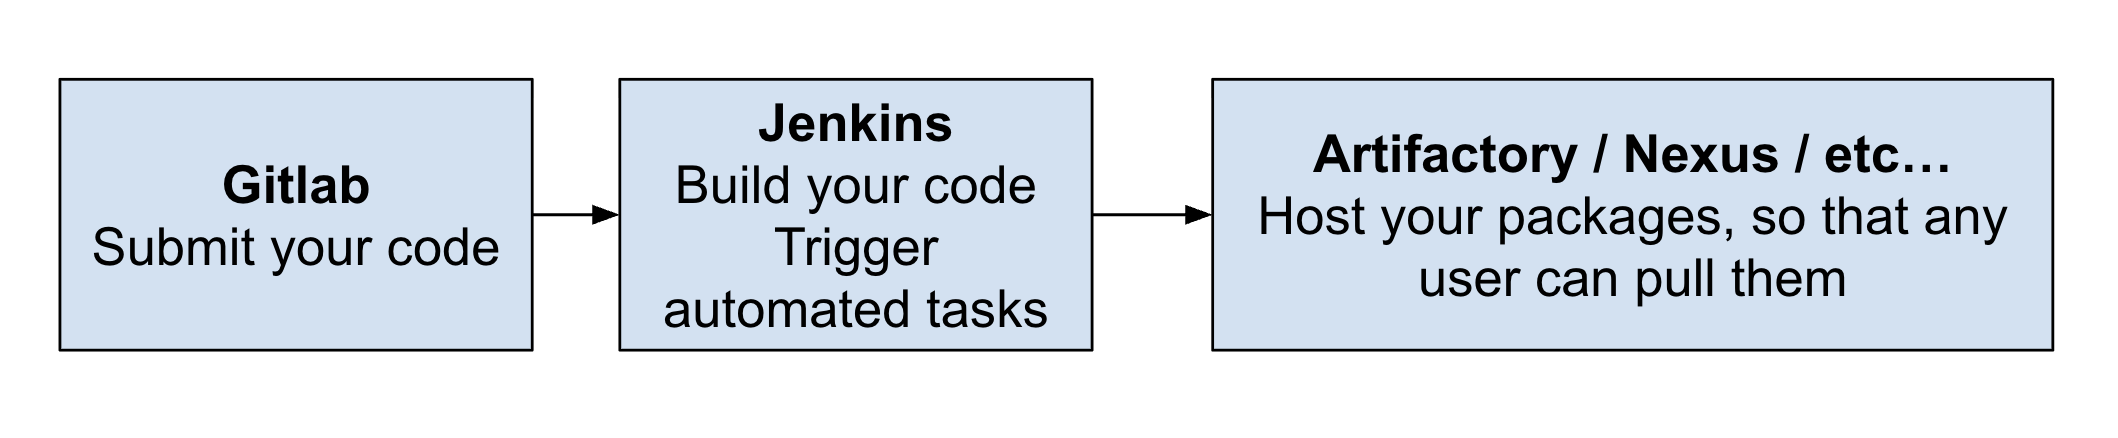
In an ideal world, with the right team to do it, the package deployment would look something like this:
- write your package, your python tool, module, etc... and submit your code
- on a given signal (e.g. merge to master branch), another platform (Jenkins is pretty famous, but not the only one) would pull the code from the repo and run a bunch of operations, i.e. build auto-documentation and test that you didn't break anything
- Jenkins then publishes (or "deploys") your package onto a server that anybody in your organization can access. The biggest players in this game are Artifactory or Nexus, at least in vfx/videogame, but it can be an in-house solution too
Our approach
Here is a diagram of what we're gonna do:
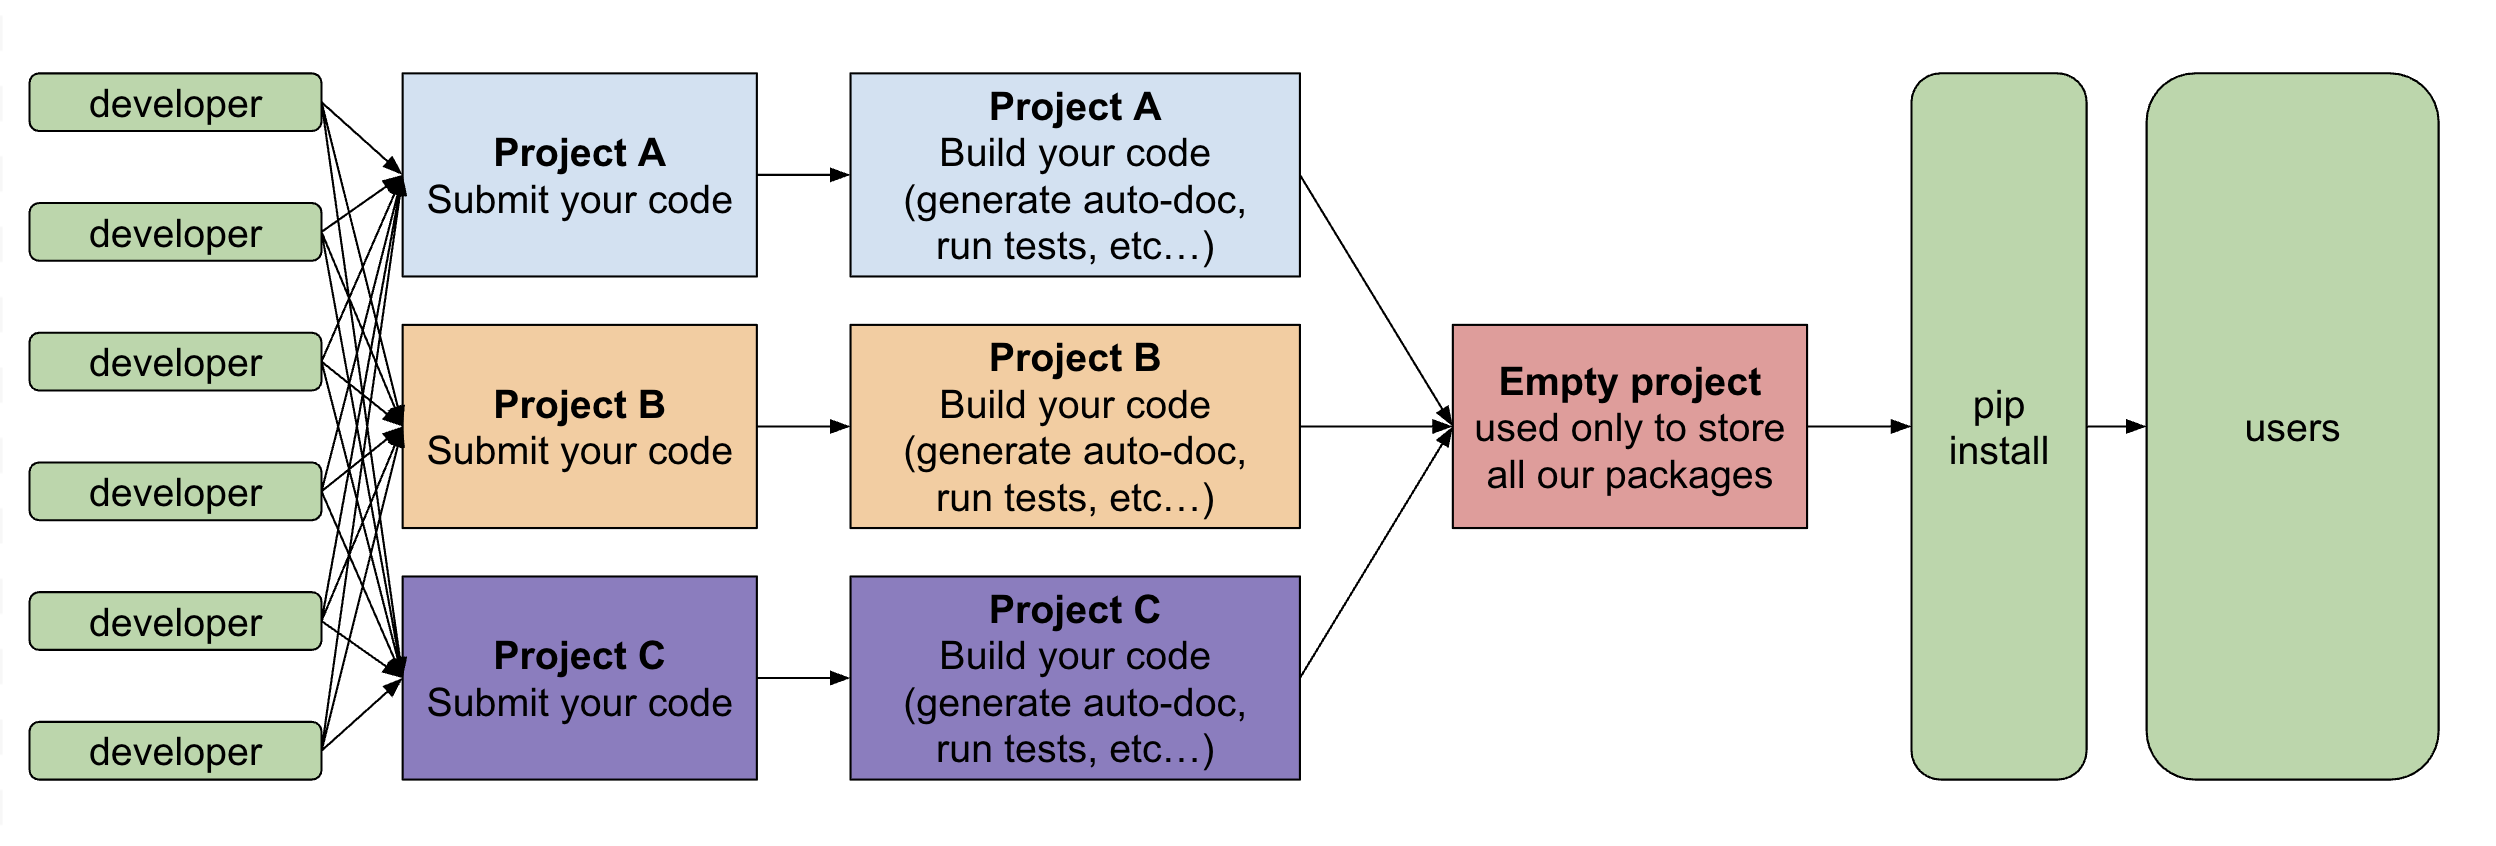
- Every developer work on their project (A, B or C in our example)
- Once they push/merge something, e.g. on the master branch, it will trigger a set of operations to build your code, test it, etc...
- The result of this build will be pushed to a dedicated location, in our case, a dummy project
- The user who want a package can just pip install your_package to get your latest update. They can also pick a specific version, or upgrade an existing version, of course
- Since you can automate some tasks, it would be a shame not to do it; once setup, it's free! The most basic tasks is to build the doc when you publish, and to run your unit tests
- From a user perspective, things will be much easier if you don't ask them to start messing around with git commands in the terminal, changing branches, etc... This leaves much less room for confusion, especially in bigger structures where you don't have an open line of communication with every end user of your tool
Roadmap
Since we'll have everything on gitlab, we need to create our projects (this is the easy part, you probably already have them), and a dedicated project to act as our pip server. This project will be empty, we will just use it to push all our other packages into it.
If we stick to our previous diagram, this is exactly all we're gonna do in gitlab (every tile is a project):

Project setup
Requirements
In order for Gitlab to initiate a CI/CD workflow, you need to create, at the root of your project, a file called .gitlab-ci.yml. This file will contain the instructions you want git to execute. I'm not gonna go through all the details of what you put in this file, as it would be way too long, and gitlab already has documentation for that. For the purpose of this tutorial, all you have to know is that it's a yaml file, with a bunch of instructions. Finally, you'll want to make sure pip knows about your custom space when you try to pip install something.
We will start with the project settings, then take a look at the gitlab-ci.yml file, and finally config our pip.
Writing into a different project
It's a bit counter intuitive, but if we want to be able to write into another project, we need to start with this step. To write into our pip-server project, you need some credentials. Those credentials are created in the pip-server project, and every project that'll have to write into our pip server needs to be aware of it. Later on, we will use those credentials (known as a token). So to summarize, we need to
- create this token on our pip server
- declare and use this token for every project that'll write on our pip server
On the pip-server project side
Here, I will assume you created an empty project, called pip_server
To create a token (that is, a alternative to username/password to authenticate without an interface), you need to go to:
Settings / Repository / Deploy token
Here, set the permissions you want, for me it's:
Scope: read_package_registry / write_package_registry (this one is mandatory)
name: cross-project-pypi-upload
username: cross-project-pypi-upload
password: save this password somewhere, you'll need it later
We'll use these credentials as username and password for our twine push
That's all we need on this side, let's move on.
For each project that will have to write on the pip-project server
To make it easier, and more secure, we are gonna create a variable in our project. This variable will hold the password you saved in your pip-server project, such that your current project will be allowed to write into the pip-server project. Go to:
Settings / CI/CD / Variables
Create a variable (e.g. for developer)
key: PIP_SERVER
value: the value defined in our pip server package

In our gitlab-ci file, we will be able to refer to our password by calling this variable.
Define the .gitlab-ci.yml
Template
Here, I'm proposing a starting point, that covers a few things one would like to have in a basic config. Heads up, we'll cover some parts later in this tutorial, but not everything, as this is a wide topic.
I assume the following structure for your project, but of course you can adapt to your needs:
- project_name
- docs
- all_your_doc_files.rst
- src
- project_name
- __init__.py
- all_your_source_files.py
- project_name
- docs
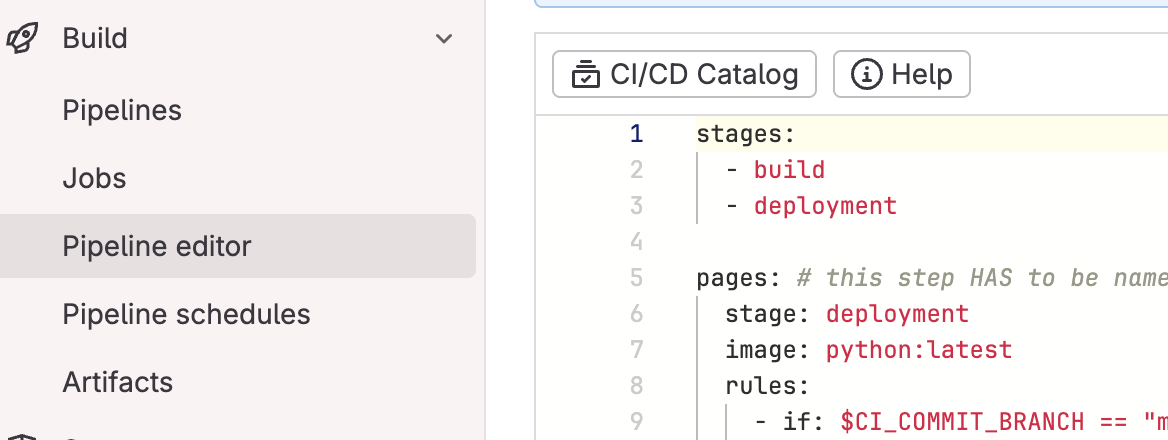
  stages:
    - build
    - deployment

  # you can ignore this step if you don't have
  # documentation. If you do, this step HAS to
  # be named "pages" in order for gitlab
  # to publish it as a gitlab.io/pages website
  pages:
    stage: deployment
    image: python:latest
    rules:
      - if: $CI_COMMIT_BRANCH == "master"
    script:
      - python -m pip install sphinx
      # if you want to build auto-doc based on
      # your docstrings, uncomment the following line
      # - sphinx-apidoc -o docs your_project_name
      - sphinx-build -b html ./docs/ public
    artifacts:
      paths:
        - public


  # this doesn't do anything, but prints some variables
  # provided by gitlab that could be useful
  echo_some_useful_env_vars:
    stage: build
    image: python:latest
    script:
      - echo $CI_API_V4_URL
      - echo $CI_PROJECT_I
      - echo $GITLAB_USER_LOGIN
      - echo $CI_COMMIT_BRANCH
      - echo $CI_COMMIT_TAG


  deploy_package: # this can be an arbitrary name
    variables:
      TWINE_USERNAME: gitlab-ci-token
      TWINE_PASSWORD: $CI_JOB_TOKEN
    stage: deployment
    image: python:latest
    rules:
      - if: '$CI_COMMIT_BRANCH == "master"'
        when: on_success  # Run only if the condition is met
      - when: never  # Skip otherwise
    script:
      - python --version && pip --version
      - echo "Installing packages required to build..."
      - python -m pip install setuptools twine build
      - echo "Building ..."
      - python -m build
      # this will write in the package registry of the current folder
      # - python -m twine upload --repository-url
      # ${CI_API_V4_URL}/projects/${CI_PROJECT_ID}/packages/pypi dist/*
      - python -m twine upload --repository-url ${CI_API_V4_URL}/
      projects/{your_pip-server-project-id}/packages/pypi
      dist/ --username cross-project-pypi-upload
      --password $PIP_SERVER
WARNING: to make it fit with my code formatter, I wrote the last line in 4 line, but in reality, make sure you convert it into one long line.
Logic
Again, I'm not gonna cover all the options available here, but here are the main takaways about this file:
- With this instruction, gitlab will launch a dedicated machine, with its own environment, and execute those instructiions. Exactly like virtual machines, or docker images if you're familiar with docker. It's a very simple way to represent it, but that's essentially what it is. Those machines are called runners, I believe they run on linux by default, but you may be able to change that with the entry - image, or even to create your own runners
- All operations happen in parallel. This is a tricky part, that means if you run an operation on line 10 that relies on what happens line 3, there is no guarantee it will work unless...
- ... you use stages. To chain different operations, you can define different stages (names are arbitrary) at the begining, then when you define operations, give them a "stage" key, with the stage during which the operation happens
- Everything happening during a specific operation is destroyed at the end of the operation. Similar to everything inside a function, in python, will be garbage collected once reached the end of the function. If I remember correctly, every operation may or may not be executed on a different runner.
- If you want to make something persistent, gitlab introduces the concept of artifact. Declaring something as an artifact will preserve it, such that you can refer to it later. We use it here to publish our documentation to gitlab pages (equivalent of github pages, this is a static website provided by git for free)
Let's push it into our gitlab project
Once you commited and pushed this file, you can go to your gitlab interface. On git, navigate to the main page of your project. Here, on the left, you will use two things. Build, and deploy. For now, let's focus on Build.
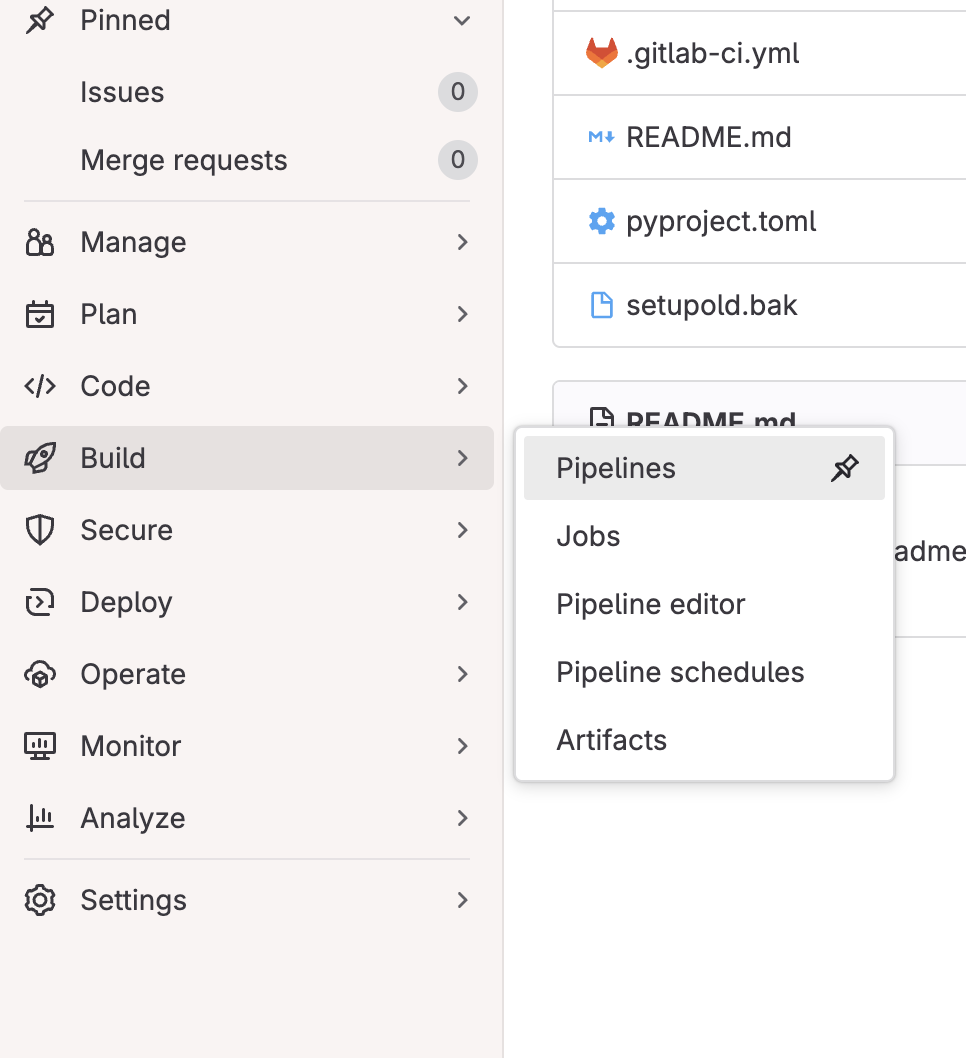
- Pipeline: Every time your build is triggered, it will be visible in this menu. You can click on the status of your build and it will bring you to a breakdown of your operations Here, if you click on any of the operations, you get access to the console log. You'll spend most of your time here, this is where you'll see errors
- Pipeline Editor: This is a shortcut to edit directly your gitlab-ci.yml file.

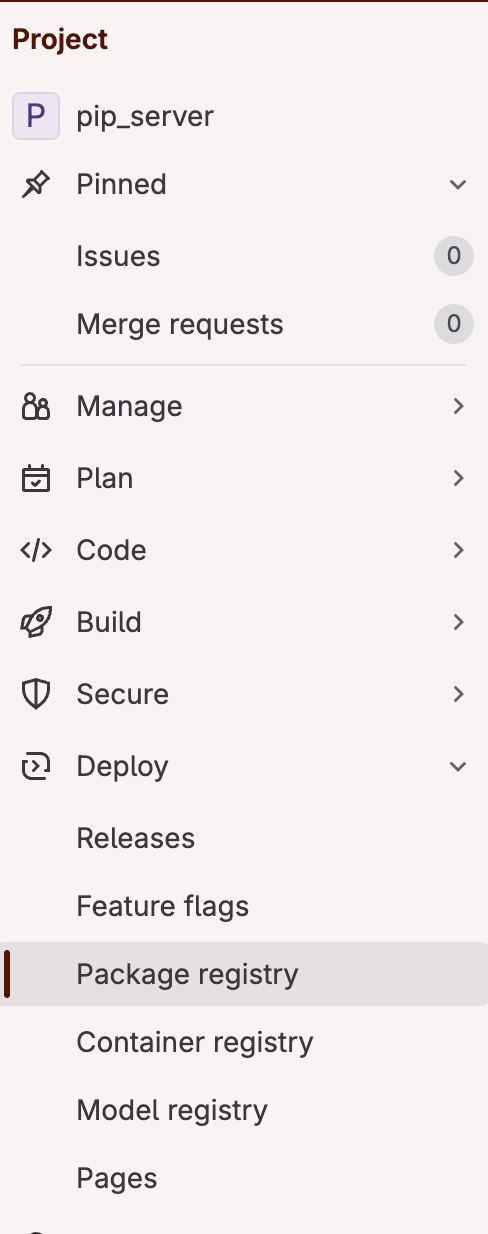
If you built your package successfullly, and went through completely, your package will be visible in your pip-project, inside Deploy / Package registry
If you didn't build your package successfully, and you failed to understand the error with the gitlab log, I suggest you try and build it locally (use the exact same commands than you have in your .gitlab-ci.yml), until it works. If it works locally, it has to work on your gitlab runner, there is nothing more happening.
Pip configuration
A bit of context
When you run a pip install ..., your pip command will automatically look online, specifically on the pypi.org server. What we want is to add our own server to our pip config, so that we can just run pip install ... and it will find our package, on our server. This is done by tweaking the pip configuration. And it is super simple
By default, pip has 3 levels of configuration
- global
- user
- site (a.k.a directly inside your virtual environment)
To locate your config files, you can run pip config -v list
Note the files may not exist yet, in which case you'll have to create it first.
But before we start overriding our pip.conf file, how can we make it access our gitlab server. After all, we need credentials everytime we want to access it ourselves, right?
Create an access token
Why and what
In our setup, we want pip to be able to access or secured and private gitlab account. Which means we're gonna need to setup what they call a PAT or personal access token. A PAT is used to avoid having to enter your username/password everytime you call a command. It's something you give a name to, an expiration date, and once created it will give you a sequence of letters and numbers. Write that down. Once created, you can't retrieve this number, you'll have to create a new one. Which is not a big deal, but still... I personnally save my PATs into my password manager. Now let's get to it.
How
On the top left corner, click your avatar and select Edit Profile. Then, in the left column, select Access Tokens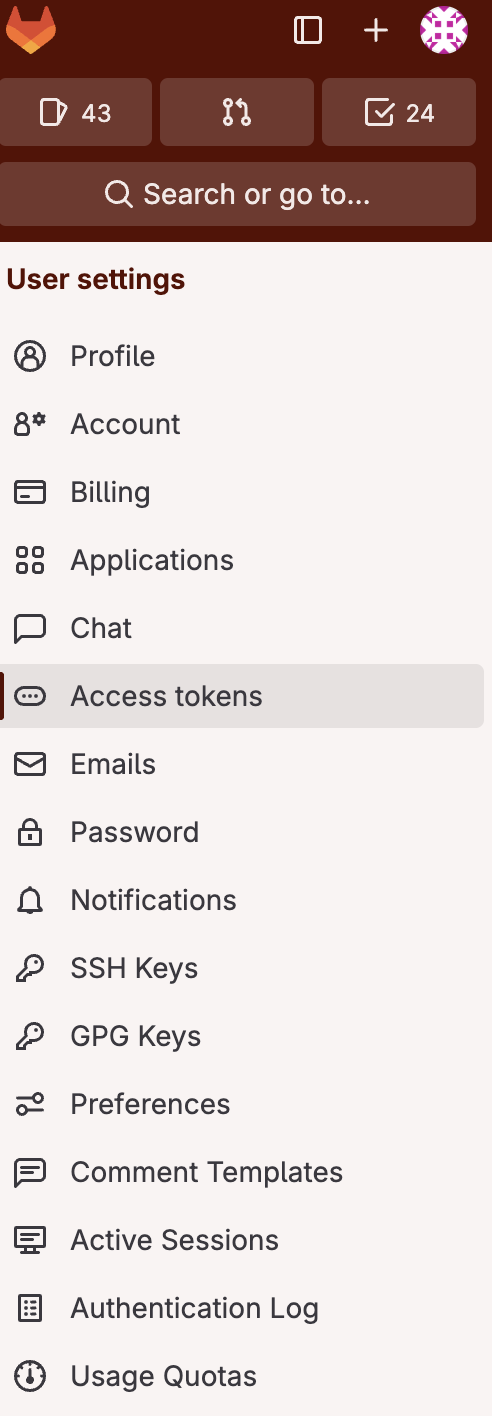
Use your PAT in pip
Once you have your PAT, you're finally ready to edit your pip config file and add your gitlab server to the list of servers checked when doing pip install. Open your pip.conf file, and add as an extra url:
[global]
extra-index-url = https://__token__:{your-access-token}>@gitlab.com/
  api/v4/projects/{your_project_id}/
  packages/pypi/simple
Again, I wrote it in multiple lines to fit within the length of the website formatter, but this is supposed to be one line!!
That's it, now your pip install command will check the package registry of the project indicated by "project_id" in addition to the regular pypi hub.
Bonuses
Secure server
If you plan to use something bigger, like a nexus server, you might need to add a few extra elements in your pip.conf file:
[global]
index = https://nexus_server.com/repository/your_pypi-repo/
index-url = https://nexus_server.com/repository/your_pypi-repo/simple
trusted-host = nexus_server.com
Note that in this example, I used index-url instead of extra-index url, meaning I override pypi.com altogether. But the main thing is this trusted-host entry, in order for pip to, well, trust this server and download from it I guess.
Documentation
If you used the same template than me, you also built some documentation. By leveraging artifacts and gitlab pages, you can now access the tool documentation using the address https://{gitlab-username}.gitlab.io/{project-name}
Of course, you need to have a documentation tool setup in your project, inside /docs. I personnally use sphinx.
Jenkins config
In case you want to use Jenkins for your CI/CD workflow, the syntax can be a bit confusing when coming from a python background. So even though it has nothing to do with the rest of this tutorial, I thought I could share with you what a typical jenkins config file looks like:
  #!/usr/bin/env groovy
  import groovy.transform.Field

  // Those are the default settings
  @Field
  Map defaults = [
      requirements: "./requirements.txt",
      testsDir: './tests'
  ]


  def call(String moduleName, Map options=[:]) {
      options = options + defaults

      pipeline {
        agent {
          docker {
            // ofc you need to have a docker labeled like this
            label 'windows && docker'
            image 'path/to/your/docker/image'
          }
        }
        stages {
          stage('Install requirements'){
            when {
              expression {
                return fileExists (options.requirements)
              }
            }
            steps {
              // here I use bat because my image is on windows
              bat "pip install -r ${options.requirements}"
            }
          }
          stage('Build') {
            steps {
              bat 'python -m build'
            }
          }
          stage('Test') {
            when {
              expression {
                return fileExists(options.testsDir)
              }
            }
            steps {
              bat "pip install --find-links=./dist ${moduleName}"
              bat "nosetests --with-xunit ${options.testsDir}"
            }
          }
          stage('Deploy') {
            when {
              branch 'master'
            }
            steps {
              withCredentials(
                [usernamePassword(
                  credentialsId: 'your_username',
                  passwordVariable: 'pass',
                  usernameVariable: 'username')]) {
                    bat "python -m twine upload --disable-progress-bar
                      --verbose -u ${username} -p ${pass}
                      -r {target-server} dist/*"
                  }
                }
              }
            }
            post {
                always {
                    junit allowEmptyResults: true,
                          keepLongStdio: true,
                          testResults: '**/nosetests.xml'
                    cleanWs deleteDirs: true,
                    disableDeferredWipeout: true
                }
            }
        }
  }
Conclusion
I hope this tutorial was useful, and that you can see the potential of having a proper CI/CD setup, even for small structures, to manage the backend of your packages distribution To go further, you can explore:
- gitlab commands in depth: you can do much more than what we saw here, but luckily, gitlab has a very complete documentation for that.
- the front end part: of course, nothing prevents you from pluging a nice interface with versionning and everything on top of this setup, if your users aren't familiar with terminal or with pip